Tips on Using Illustrations
Table—summarize information in categories.
Bar graph—compare and contrast two or more subjects at the same point in time.
Column graph—reveal change in a subject at regular intervals of time.
Circle graph—display the number and relative size of the divisions of a subject.
Line graph—show the degree and direction of change relative to two variables.
Organization chart—map the divisions and levels of responsibility within an organization.
Flow chart—show the sequence of steps in a process or procedure.
Project Schedule Chart—display start and stop dates for tasks related to a project.
Diagram—identify the parts of a subject and their spatial or functional relationship.
Photograph—show what a subject looks like in realistic detail.
Infographics—make information easier to understand and remember.
Video clip—depict a process, operation, or incident in realistic detail.
Animation clip—simulate a process, operation, or incident.
It's extremely important that you consider issues of copyright when creating content for course projects or presentations and especially if you plan on using imagery in a personal website or blog. Because you're a student, there are some copyright exemptions available to you, but you really do want to use images with caution. Many, many students incorporate images illegally, but hopefully after looking at this brief activity you'll be more informed and able to protect yourself.
As a general rule of thumb, consider all images online protected. If you use a protected image in the wrong way, you might get away with it, you the owner of the image may find out and request that you stop using their image, or the owner of the image can actually bring legal proceedings. Go to the next section in this resource to learn about US Copyright Laws.
US Copyright Laws were written years ago and they are years behind our fast-paced world of social media and blogs. There is something called the Digital Millennium Copyright Act, but it still doesn't completely explain how we're supposed to use and reuse another person's photos or images online. Keep reading to learn about Section 107 of the Copyright Law covering Fair Use.
In its most general sense, a fair use is any copying of copyrighted material done for a limited and “transformative” purpose, such as to comment upon, criticize, or parody a copyrighted work. Such uses can be done without permission from the copyright owner.
Commentary/Criticism
Example: This critical essay on Wuthering Heights includes a passage from the novel.
Parody
Example: In 2011, the 7th Circuit Court ruled that the TV show South Park's parody of a viral video was fair use.
News Reporting
Example: This article about an advertising campaign includes a screenshot of a TV commercial as an illustration.
Teaching
Example: A film may be shown in a classroom as part of the curriculum (as long as specific criteria are met).
Research
Example: A researcher may make a single copy of a scholarly article for personal use.
Unless the website specifically says that you can use an image or other piece of media, consider it copyrighted and something that you cannot freely use. Some people adding images online will occasionally include information in the image's details letting you know if it's copyrighted or free to use, but usually that isn't the case. You can reach out to the website's owner to ask for permission, and in a perfect world they'd respond to immediately you saying "sure, go ahead." This isn't the case though. Fortunately, you can avoid a lot of this by simply finding an image in the public domain.
Flickr: The Commons - A great feature from the popular photo sharing site Flickr where institutes such as The Library Of Congress, Powerhouse Museum, Brooklyn Museum, Smithsonian Institution, and various users can post and share images that have no known copyright restrictions.
Public Domain Images - Public domain images, royalty free stock photos, copyright friendly free images. Not copyrighted, no rights reserved. All pictures on this site are explicitly placed in the public domain, free for any personal or commercial use.
Wikimedia Commons - Fantastic media repository that is part of the Wikipedia umbrella project where users are free to use any of the sites photos, audio, videos, and other media freely.
Library of Congress Prints & Photographs Online - Images from the Library of Congress, now in the public domain.
National Gallery of Art - With the launch of NGA Images, the National Gallery of Art implements an open access policy for digital images of works of art that the Gallery believes to be in the public domain. Images of these works are now available free of charge for any use, commercial or non-commercial.
Free sites:
In an essay or report it's important to label the illustrations used and reference the label in the report. Be consistent with your labels -- Figure A, Figure B or Figure 1.1, Figure 1.2. After labeling an illustration, reference the label in the report. Look at the excerpt from a student paper below. Make note of the "Figure 2: Gait Belt" label the student applied to the image, and see how the student referenced the label in the first sentence -- "(see Figure 2)".

You should also label and give credit to resources on a slide in a presentation. In the image below, notice how the student labeled the image, titled the image, and included the name of the resource in parenthesis. The resource is also linked to the page where the student found the image.

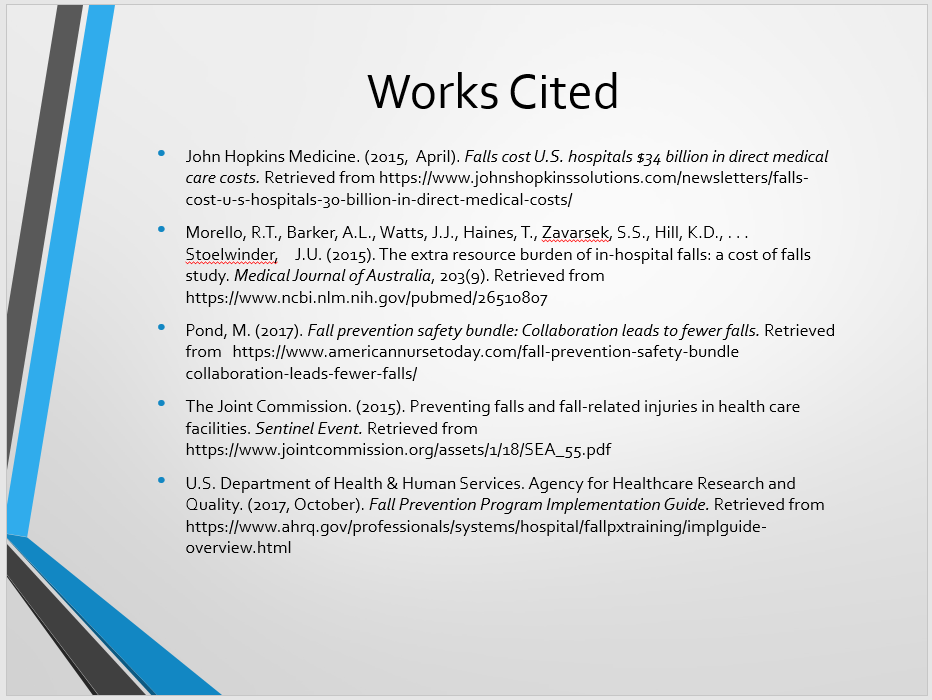
The student also added this resource to the Works Cited slide at the end of the presentation.